
Top Smartphone Photography Techniques for Beginners

Smartphone photography is an accessible way to capture stunning images without expensive equipment. You can master smartphone photography by understanding your camera, using natural light, and editing thoughtfully.
This article explores practical techniques to elevate your mobile photography skills, whether you're snapping everyday moments or aiming for professional-looking shots. No advanced gear is required—just your phone and a willingness to experiment.
The beauty of smartphone photography lies in its simplicity and portability. With modern smartphones boasting powerful cameras, anyone can create high-quality images. By learning a few key techniques, such as composition, lighting, and editing, you can transform ordinary photos into extraordinary ones.
This guide is designed for beginners, offering step-by-step advice to build confidence behind the lens.
You don’t need to be a tech expert to excel at mobile photography. The tips here focus on leveraging your smartphone’s built-in features and free tools to enhance your shots. From mastering the rule of thirds to choosing the right editing app, these strategies will help you see the world through a creative lens.
Let’s dive into the essentials of smartphone photography and unlock your potential.
Understanding Your Smartphone Camera
Your smartphone camera is packed with features that can make or break your photos. Start by exploring the default camera app to understand its modes, such as portrait, night, or panorama. Each mode is designed for specific scenarios, so knowing when to use them is key. For example, night mode enhances low-light shots, while portrait mode blurs the background for a professional effect.
Many smartphones also offer manual controls, allowing you to adjust settings like ISO, shutter speed, and white balance. These options give you more creative freedom, especially in challenging lighting conditions.
If your default app lacks these features, consider downloading a third-party app like Adobe Lightroom Mobile or Camera FV-5. Experimenting with manual settings can significantly improve your mobile photography results.
Exploring Camera Features
Every smartphone camera has unique strengths. Some models excel at macro photography, capturing tiny details like flower petals, while others shine in wide-angle shots for landscapes. Check your phone’s specs to identify its capabilities. For instance, newer iPhones and Samsung Galaxy models often include ultra-wide lenses, perfect for expansive scenes.
Adjusting Basic Settings
Tweak settings like brightness and focus before snapping a photo. Tap the screen to set the focus point, ensuring your subject is sharp. If the image looks too dark or bright, use the exposure slider (if available) to balance the light. These small adjustments can make a big difference in the quality of your smartphone camera tips.
Choosing the Right Camera App
Not all camera apps are created equal. While your phone’s default app is convenient, third-party apps often offer advanced controls and filters. Apps like VSCO or Snapseed provide robust editing tools alongside shooting features. Test a few to find one that suits your style and enhances your smartphone photography experience.

Mastering Smartphone Photography Basics
Great smartphone photography starts with understanding the fundamentals of composition and exposure. Composition is about arranging elements in your frame to create a balanced, visually appealing image. Exposure determines how light or dark your photo appears. Mastering these basics will set a strong foundation for all your mobile photography projects.
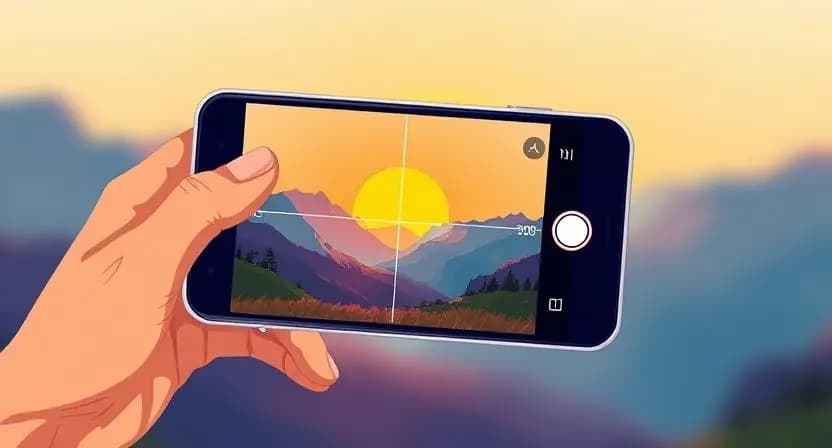
One of the easiest ways to improve composition is by using the rule of thirds, a technique that divides your frame into a 3x3 grid. Place your subject along the gridlines or at their intersections for a more dynamic shot.
Most smartphone cameras have a grid overlay option to help you align your shots. This simple trick can instantly elevate your photos.
Exposure is equally important. If a photo is too bright, details get washed out; if it’s too dark, you lose clarity. Your phone’s auto-exposure does a decent job, but manual adjustments give you more control. Tap and slide on the screen to adjust brightness before shooting. Practice in different lighting conditions to get a feel for what works best.
Don’t be afraid to experiment with angles and perspectives. Instead of shooting straight on, try crouching low or holding your phone above your subject. These creative choices can make your photos stand out. The more you practice these smartphone camera tips, the more intuitive they’ll become.
Focusing on Composition
Composition is the backbone of any great photo. Beyond the rule of thirds, consider leading lines—like roads or fences—that draw the viewer’s eye into the image. Symmetry and patterns also create striking visuals. When composing, take a moment to scan the frame for distractions, like stray objects, and adjust your angle to eliminate them.
Using the Rule of Thirds
To activate the rule of thirds grid, go to your camera settings and enable the grid overlay. Practice aligning key elements, like a person’s face or a horizon, with the gridlines. This technique works for portraits, landscapes, and even food photography. It’s a versatile tool that enhances your mobile photography skills.
Balancing Exposure and Brightness
If your photos look uneven, check the lighting. Bright sunlight can create harsh shadows, while dim indoor light may make images grainy. Use your phone’s exposure controls to fine-tune brightness. For tricky scenes, try HDR mode, which blends multiple exposures for a balanced result. This is especially useful for smartphone photography in high-contrast settings.
Leveraging Natural Light for Stunning Photos
Light is the heart of photography, and natural light is your best ally in smartphone photography. Unlike artificial light, natural light is soft, flattering, and free. The key is to understand how to use it effectively. Whether you’re shooting outdoors or indoors, the right lighting can transform your images.
The best time for outdoor photography is during the golden hour, the period shortly after sunrise or before sunset. The light is warm and diffused, casting a soft glow that enhances colors and reduces harsh shadows. If you’re shooting midday, seek shade or use a reflector (even a white sheet of paper works) to soften the light. These smartphone camera tips will help you capture vibrant, well-lit photos.
Indoors, position your subject near a window to take advantage of natural light. Avoid mixing different light sources, like sunlight and fluorescent bulbs, as this can create unnatural color casts. If the light is too harsh, hang a sheer curtain to diffuse it. Small tweaks like these can make your mobile photography look polished and professional.
Always observe how light interacts with your subject. Side lighting highlights texture, while backlighting creates a dramatic silhouette. Experiment with different angles to see what flatters your scene. With practice, you’ll develop an eye for lighting that elevates your smartphone photography.
Shooting During Golden Hour
Plan your shoots around golden hour for warm, dreamy photos. Apps like SunSurveyor can help you track sunrise and sunset times. Arrive early to scout your location and test angles. This time of day is ideal for portraits, landscapes, and even urban shots, giving your mobile photography a professional edge.
Avoiding Harsh Shadows
Midday sun can create unflattering shadows, especially for portraits. If you must shoot in bright light, position your subject in open shade, like under a tree. Alternatively, use a reflector to bounce light onto their face, softening shadows. These smartphone camera tips ensure your photos look clean and balanced.
Using Diffused Light Indoors
Windows are your best friend for indoor smartphone photography. Place your subject facing the window for soft, even lighting. If the light is too strong, diffuse it with a curtain or tissue paper. Avoid using your phone’s flash, as it creates harsh, unnatural effects. Diffused light keeps your photos looking natural.
Enhancing Photos with Editing Tools
Editing is where your smartphone photography truly comes to life. Even the best shots can benefit from a little polishing. Free apps like Snapseed, VSCO, or Adobe Lightroom Mobile offer powerful tools to enhance your images without overwhelming beginners. The goal is to enhance, not overdo, your photos.
Start with basic adjustments like cropping to improve composition or straightening horizons. Then, tweak brightness, contrast, and saturation to make colors pop. Most apps have sliders for these settings, making it easy to experiment. Be subtle—over-editing can make photos look unnatural. Aim for a clean, vibrant look that reflects your original vision.
Filters are tempting, but use them sparingly. A light filter can add mood, but heavy ones often overpower the image. Instead, focus on targeted edits, like sharpening details or boosting shadows. Many apps also offer presets, which are pre-configured edits you can customize. These are great for creating a consistent style across your mobile photography.
Finally, save your edited photos in high resolution to preserve quality. Most apps let you export in JPEG or PNG formats. Keep backups of your original images in case you want to revisit them. With practice, editing will become a seamless part of your smartphone photography workflow.
Selecting User-Friendly Editing Apps
Choose an app that matches your skill level. Snapseed is intuitive for beginners, with tools like selective adjustments for specific areas of a photo. Lightroom Mobile offers more advanced features, like color grading, but has a gentle learning curve. Download a few and test their interfaces to find your favorite.
Adjusting Contrast and Saturation
Contrast adds depth by making darks darker and lights lighter. Saturation controls color intensity—too much, and your photo looks cartoonish. Adjust these sliders gradually, checking the effect on your image. For natural results, aim for a balance that enhances without overpowering your smartphone photography.
Applying Filters Sparingly
Filters can set a mood, like a warm tone for cozy shots or a cool one for urban scenes. However, heavy filters can obscure details. Apply them at low opacity or tweak their settings for a subtle effect. This keeps your mobile photography authentic and visually appealing.

Exploring Creative Smartphone Photography Techniques
Once you’ve mastered the basics, it’s time to get creative with your smartphone photography. Try techniques like long exposure for dreamy light trails or macro shots for intricate details. Many smartphones support these modes natively, or you can use apps like Slow Shutter Cam to simulate advanced effects.
Another fun approach is playing with reflections. Puddles, mirrors, or glass surfaces can add a surreal element to your photos. Position your phone carefully to capture the reflection without including yourself in the frame. These creative techniques make your mobile photography stand out on social media or in your portfolio.
Double exposure is another artistic option, blending two images into one. Some camera apps, like Photoleap, offer this feature, letting you combine a portrait with a nature scene for a striking effect. Experimentation is key—don’t be afraid to try bold ideas and see what works.
Keep a notebook or app to jot down inspiration for creative shots. Whether it’s a unique angle or a quirky subject, these ideas will fuel your smartphone photography journey. The more you explore, the more you’ll discover your unique style.
Using Accessories to Elevate Your Shots
Accessories can take your smartphone photography to the next level without breaking the bank. A tripod, like the Joby GripTight, stabilizes your phone for sharp shots, especially in low light or for time-lapses. Small, portable tripods are easy to carry and set up anywhere.
Lens attachments are another game-changer. Clip-on lenses, like those from Moment or Olloclip, add wide-angle, macro, or fisheye effects to your camera. They’re affordable and compact, making them ideal for beginners. A macro lens, for example, lets you capture stunning close-ups of flowers or insects.
A portable light source, like a small LED ring light, enhances indoor or evening shots. These lights are adjustable and clip onto your phone, providing soft, even illumination. They’re especially useful for portraits or food photography, where lighting is critical.
Before buying accessories, check compatibility with your phone model. Start with one or two items, like a tripod and a macro lens, and expand as you grow. These tools will enhance your smartphone camera tips and open new creative possibilities.
Capturing Unique Perspectives
Perspective is what makes your smartphone photography memorable. Instead of shooting at eye level, try unusual angles—like lying on the ground for a worm’s-eye view or climbing a staircase for a bird’s-eye shot. These angles add drama and intrigue to your images.
Get close to your subject for a fresh take. Fill the frame with a flower’s petals or a pet’s face to create intimacy. Alternatively, step back to capture the context of a scene, like a bustling market or a quiet forest. Varying your distance keeps your mobile photography dynamic.
Don’t shy away from unconventional subjects. Photograph shadows, textures, or everyday objects in new ways. A cracked sidewalk or a colorful door can become art with the right perspective. Challenge yourself to see the ordinary through a creative lens.
Finally, review your photos regularly to identify what works. Save your best shots in a dedicated album and note what made them successful. This habit will sharpen your eye and inspire future smartphone photography projects.
Smartphone photography is a journey of discovery, blending technical skills with creative vision. By understanding your camera, harnessing natural light, and experimenting with editing and accessories, you can capture images that rival professional shots. Each photo you take is a chance to refine your craft and express your unique perspective. Keep practicing, and you’ll be amazed at how far your skills can grow.
Ready to take your mobile photography to the next level? Try one new technique from this guide today and share your results with friends or on social media. What’s your favorite smartphone photography tip?
Let us know in the comments or tag us in your best shots—we’d love to see your creativity in action!
